In emergency situations, every second counts and being trained in cardiopulmonary resuscitation (CPR) can make all the difference between life and death. But don’t worry, you don’t need years of medical training or a degree in nursing to master this life-saving skill. With just five minutes of your time and our step-by-step guide, you’ll be able to confidently provide CPR when it matters most. So let’s dive into these essential CPR techniques! In this post, I’ll take you through each action required to provide CPR step-by-step.
Before you begin CPR
If someone is unconscious, check first if they are breathing. Then, check the person’s airway and breathing by checking for the rise and fall of the abdomen or diaphragm. As long as the victim is breathing, place them in the recovery position. If they are not breathing, f he is not breathing, get someone to call 9-1-1 and start C-A-B (Compression, Airway, Breathing). In that order: compressions, airway, and breathing.
Perform CAB (Compression, Airway, Breathing)
CPR, or cardiopulmonary resuscitation, is a life-saving technique that can be used on someone who has suffered a cardiac arrest. The goal of CPR is to restore blood flow to the heart and lungs and to prevent brain damage. CPR can be performed by anyone, regardless of their medical training. However, it is important to know how to properly perform CPR in order to maximize its effectiveness.
Compression
Put the victim on their back and begin compressions, don’t be afraid to move them, kneel down and directly to the victim’s shoulders. with your elbows locked out.
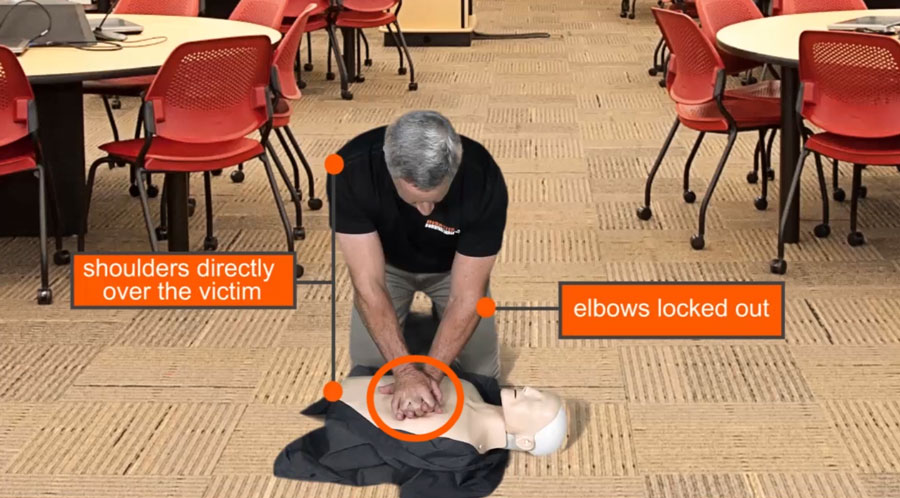
You need to place the heel of your hand directly on the sternum.
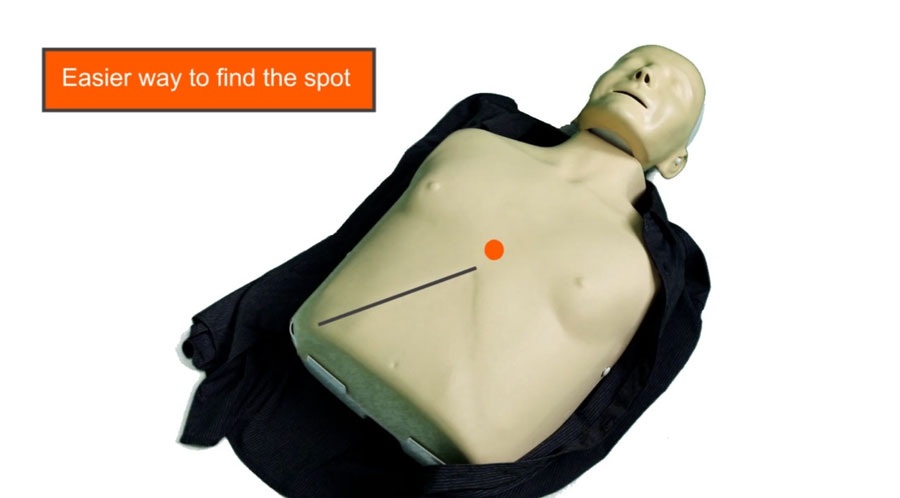
If you want to perform good CPR, you must place your hands in the right place on the chest.
Place your fingers on the ribcage and follow the ribs to the tip of the sternum to find your perfect spot
At the tip of the sternum, place two fingers on the furthest point.
Put your two fingers right next to the heel of the other hand and place the heel of the other hand on top of the sternum
(No matter which hand you place on the chest first, it doesn’t matter.)
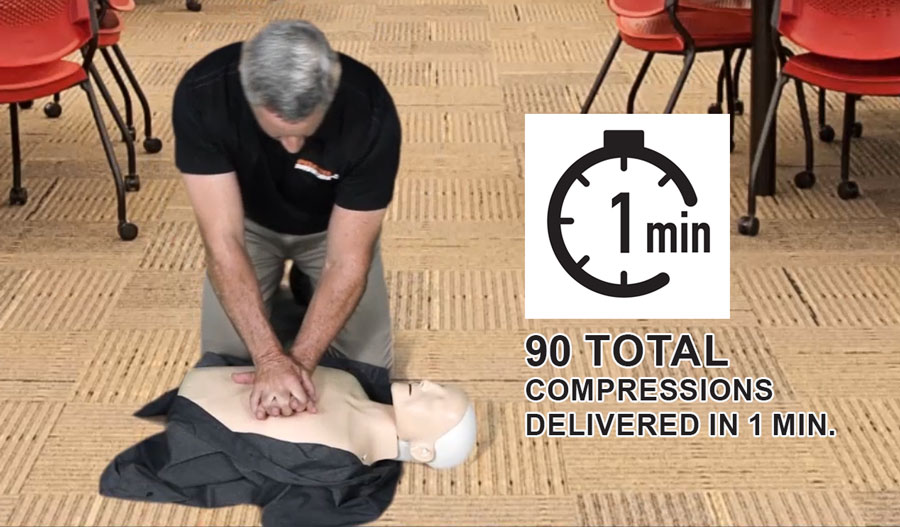
Now, interlace your fingers with the other hand, and begin pressing. We begin our first round of 30 chest compressions.
The pace will be 100 to 120 compressions per minute.
On the chest, we will push it two and a half to two-and-a-half inches deep.
After each compression, allow the chest to fully recoil.
Airway
Perform the head-tilt chin-lift maneuver, this should be used to clear the victim’s airway before breathing.
How to perform the head-tilt chin-lift maneuver.

Put one hand on the forehead and tilt back while lifting the chin with the other
After clearing the tongue from any obstructions in the airway, quickly check the mouth for any surprises like food, gum, or other foreign objects. Now that the mouth is clear and the head is tilted back, it’s time to breathe.
Seal the victim’s mouth with your fingers by pinching his or her nose
If a CPR mask is available, use it. Do not delay CPR by searching for it.
Breathing
Give breath in one second. Just enough to make the chest rise.
Give your second breath after removing your mouth and letting your chest fall.
You will need to continue this cycle until help arrives or the victim begins to breathe on their own.
(Two breaths, head tilt, chin lift, and then airway.)
That’s it.
Conclusion
Knowing CPR can be a lifesaver and it is something everyone should learn. We hope we have shown you that learning CPR in five minutes is doable – with the right strategies, tips, and techniques. Taking the time to educate yourself on how to administer CPR correctly could potentially save someone’s life one day. So don’t wait any longer – sign up for a free online training today!


Comments are closed.